Introduction
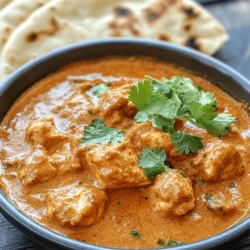
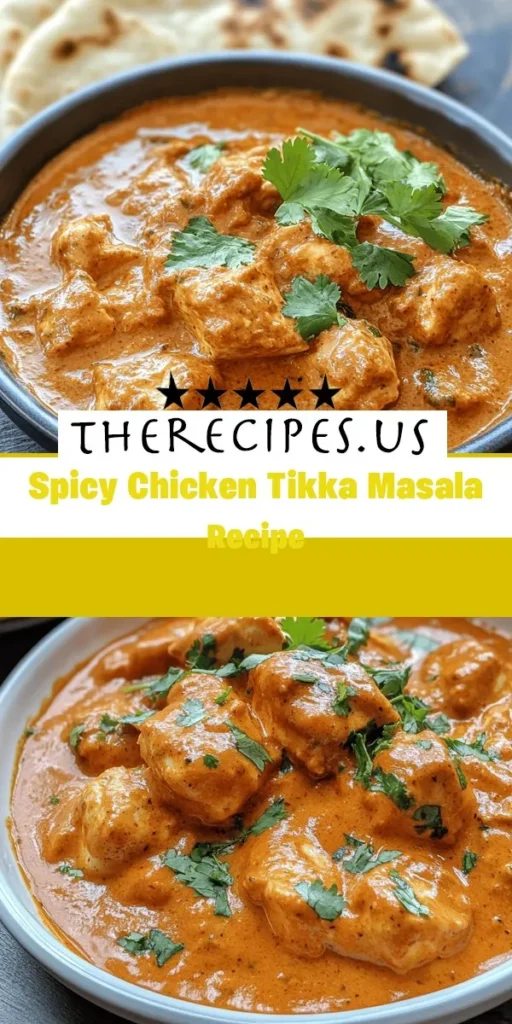
Spicy Chicken Tikka Masala is a beloved dish that combines tender marinated chicken with a rich, flavorful sauce. Originating from Indian cuisine, this dish has won hearts worldwide with its vibrant spices and creamy texture. The marriage of marinated chicken, grilled to perfection, and a luscious tomato-based sauce is a symphony of taste that can elevate any dining experience. Whether you are a seasoned cook or a culinary novice, this recipe will guide you through creating an authentic and satisfying meal that can be enjoyed with family and friends.
In this article, we will delve into the ingredients, preparation techniques, and the cultural significance of this dish, ensuring you have all the information needed to recreate this masterpiece in your kitchen.
Understanding Chicken Tikka Masala
Exploring the Origins of Chicken Tikka Masala
Chicken Tikka Masala’s origins are somewhat shrouded in mystery, with its roots traced to Indian cuisine. While many believe the dish was created in India, others argue that it was developed by Indian chefs in the United Kingdom to cater to British tastes. The story goes that a customer in a British curry house asked for a sauce to accompany his dry chicken tikka; the chef improvised with a rich tomato gravy, and thus, Chicken Tikka Masala was born.
Over the years, this dish has evolved and adapted, becoming a staple in Indian restaurants worldwide. It showcases the versatility of Indian cooking—blending traditional flavors with local ingredients. Today, Chicken Tikka Masala represents not just Indian cuisine, but a global phenomenon, enjoyed by food lovers across continents.
The Role of Spices in Creating Flavor
Spices are the heart and soul of Chicken Tikka Masala. They are what transform simple ingredients into a flavor explosion that dances on the palate. The essential spices used in this recipe include cumin, coriander, turmeric, garam masala, and chili powder. Each spice contributes uniquely to the dish, creating a harmonious balance of heat, earthiness, and warmth.
1. Cumin: Offers a nutty, peppery flavor that enhances the overall depth of the dish.
2. Coriander: Adds a light, citrusy note that brightens the sauce.
3. Turmeric: Known for its vibrant yellow color, it provides an earthy flavor and health benefits, including anti-inflammatory properties.
4. Garam Masala: A blend of spices that adds warmth and complexity to the sauce.
5. Chili Powder: Introduces the desired heat level, making the dish spicy yet enjoyable.
In addition to their flavor profiles, these spices also carry health benefits. They are rich in antioxidants and have been linked to various health advantages, including improved digestion and reduced inflammation.
Ingredients Breakdown
The Importance of Quality Ingredients
The foundation of any great dish lies in its ingredients. For Chicken Tikka Masala, selecting high-quality components is essential to achieving authentic flavors and textures.
– Chicken: Opt for boneless, skinless chicken thighs or breasts. Chicken thighs are generally more flavorful and remain moist during cooking, making them an excellent choice for this recipe.
– Yogurt: Choose plain, unsweetened yogurt for marinating the chicken. Yogurt not only tenderizes the meat but also infuses it with flavor. For those with dietary restrictions, you can use dairy-free yogurt alternatives.
– Tomatoes: Fresh tomatoes can be used, but canned tomatoes often provide a more consistent flavor and texture. If opting for fresh, look for ripe, juicy tomatoes for the best results.
– Coconut Milk or Heavy Cream: The addition of coconut milk or heavy cream is crucial for achieving the rich, creamy consistency that Chicken Tikka Masala is known for. Coconut milk offers a dairy-free option with a subtly sweet flavor, while heavy cream adds a luxurious mouthfeel.
Detailed Ingredient List
Here’s a thorough examination of each ingredient used in the recipe, along with potential substitutions for dietary restrictions:
1. Chicken: 1.5 lbs boneless, skinless chicken thighs or breasts.
– *Substitution*: For a vegetarian option, replace chicken with paneer or tofu.
2. Plain Yogurt: 1 cup, preferably Greek yogurt.
– *Substitution*: Use a dairy-free yogurt alternative for a vegan version.
3. Tomatoes: 1 can (14 oz) of crushed tomatoes or 2 cups fresh tomatoes, diced.
– *Substitution*: For a smoother sauce, opt for tomato puree.
4. Coconut Milk or Heavy Cream: 1 cup for a creamy texture.
– *Substitution*: Use coconut cream for a richer flavor or almond milk for a lighter option.
5. Spices:
– 1 tablespoon cumin
– 1 tablespoon coriander
– 1 teaspoon turmeric
– 2 teaspoons garam masala
– 1-2 teaspoons chili powder (adjust to taste)
6. Garlic and Ginger: 4 cloves garlic, minced, and 1 tablespoon ginger, grated.
– *Substitution*: Use garlic powder and ground ginger in a pinch, but fresh is recommended for best flavor.
7. Oil: 2 tablespoons vegetable oil or ghee for cooking.
– *Substitution*: Use olive oil or coconut oil for a different flavor profile.
8. Salt: To taste.
By understanding the role of each ingredient and their potential substitutes, you can create a Chicken Tikka Masala that caters to your taste preferences and dietary needs.
Marinating the Chicken
The Science Behind Marination
Marinating the chicken is a crucial step in this recipe, as it enhances both flavor and tenderness. The yogurt in the marinade acts as a tenderizer due to its acidity, breaking down the protein in the chicken. This process not only infuses the meat with spices but also helps to retain moisture during cooking, resulting in a succulent and flavorful dish.
For optimal results, it is recommended to marinate the chicken for at least 1 hour, though overnight marination yields the best flavor. The longer the chicken sits in the marinade, the more pronounced the spices will be.
Step-by-Step Guide to Marinating Chicken
Here’s a comprehensive guide to the marination process:
1. Prepare the Marinade: In a large bowl, combine the yogurt, minced garlic, grated ginger, and all the spices (cumin, coriander, turmeric, garam masala, and chili powder). Add salt to taste.
2. Coat the Chicken: Cut the chicken into bite-sized pieces for even cooking. Add the chicken to the marinade, ensuring each piece is fully coated.
3. Marination Time: Cover the bowl with plastic wrap and refrigerate. Allow the chicken to marinate for at least 1 hour, or preferably overnight for maximum flavor absorption.
4. Even Coating Tips: To ensure even coating, consider using your hands to mix the chicken with the marinade thoroughly. This helps distribute the spices more evenly.
By following these marination steps, you set the stage for a Chicken Tikka Masala that is bursting with flavor and tenderness, ready to be grilled or cooked to perfection.
Grilling the Chicken
Choosing the Right Cooking Method
The final cooking method for Chicken Tikka Masala can greatly impact the overall flavor and texture of the dish. While grilling is the traditional approach, you can also bake or pan-sear the marinated chicken. Grilling imparts a smoky flavor and char that enhances the dish, while baking may be more convenient for those who prefer a less hands-on approach.
This step-by-step guide will help you understand the best practices for grilling your marinated chicken, ensuring it is cooked to perfection and ready to be combined with the rich sauce that characterizes Chicken Tikka Masala.
By using quality ingredients and following the marination process closely, you are well on your way to creating an authentic and mouthwatering Chicken Tikka Masala that will impress your family and friends. Stay tuned for the next part of this article where we will explore the cooking methods and sauce preparation that bring this dish to life.

Pros and Cons of Grilling vs. Baking Chicken
When preparing chicken for your Spicy Chicken Tikka Masala, the method of cooking can significantly influence the flavor and texture of the final dish. Both grilling and baking have their unique advantages and drawbacks.
Grilling Chicken:
Pros:
– Flavor: Grilling imparts a smoky flavor that enhances the overall taste of the chicken. The direct heat caramelizes the sugars in the marinade, creating a delicious char.
– Texture: Grilled chicken often has a slightly crispy exterior while maintaining juiciness inside, making it tender and flavorful.
Cons:
– Weather Dependency: Grilling is often contingent on weather conditions; it may not be feasible in the rain or cold.
– Equipment: Requires a grill, which may not be available to everyone.
Baking Chicken:
Pros:
– Convenience: Baking allows for a more hands-off approach; you can set it in the oven and focus on preparing other components of the dish.
– Controlled Cooking: Baking provides a consistent temperature, reducing the risk of overcooking.
Cons:
– Lack of Char: Baked chicken might not achieve the same level of char and smokiness as grilled meat, which can affect flavor.
– Texture: If not monitored, baked chicken can become dry, especially if overcooked.
Choosing between grilling and baking often comes down to personal preference and available resources. Both methods have their merits, and either can yield delicious results for your Chicken Tikka Masala.
Essential Equipment Needed for Grilling or Baking
To successfully prepare your Chicken Tikka Masala, ensure you have the following equipment:
For Grilling:
– Grill (Gas or Charcoal): A good-quality grill is essential for achieving optimal flavor.
– Grilling Tools: Tongs and a spatula for flipping and handling the chicken.
– Meat Thermometer: To ensure the chicken is cooked to the perfect internal temperature (165°F).
– Basting Brush: For applying additional marinade or oil to the chicken while grilling.
For Baking:
– Oven: A conventional oven is all you need for baking the chicken.
– Baking Sheet or Roasting Pan: A large, flat surface with a raised edge to catch juices.
– Aluminum Foil: To cover the chicken during cooking to retain moisture.
– Meat Thermometer: Essential for checking doneness.
Step-by-Step Grilling Instructions
Preparing the Grill
1. Preheat the Grill: Light your grill and allow it to reach a medium-high heat (about 400°F to 450°F). This temperature is ideal for achieving a great sear on the chicken.
2. Oil the Grate: To prevent sticking, brush the grill grate with a little oil or use a non-stick spray.
Achieving the Perfect Char and Doneness
1. Place the Chicken: Arrange the marinated chicken pieces on the grill, ensuring they are not overcrowded to allow for even cooking.
2. Monitor Cooking Time: Grill the chicken for about 5-7 minutes on each side. Use a meat thermometer to check for doneness; the internal temperature should reach 165°F.
3. Create Grill Marks: Rotate the chicken 90 degrees halfway through grilling each side to achieve beautiful grill marks.
Preparing the Masala Sauce
Creating a flavorful base for your Chicken Tikka Masala is essential for the dish’s success.
The Significance of Sautéing Onions and Spices
Start by heating oil in a large skillet over medium heat. Once hot, add finely chopped onions. Cooking onions until they are golden brown not only builds the foundation of flavor in your sauce but also caramelizes their natural sugars, adding depth.
Technique Tip: Stir the onions frequently to prevent burning. This may take around 10-15 minutes to achieve the desired golden-brown color.
Adding Depth to the Sauce
1. Incorporate Spices: Once the onions are golden, add garlic, ginger, and spices (cumin, coriander, turmeric, garam masala, and cayenne) to the pan. Sauté for about 2-3 minutes until fragrant.
2. Simmer and Thicken: Pour in crushed tomatoes and bring the mixture to a simmer. Allow it to cook for about 10-15 minutes, stirring occasionally. This helps thicken the sauce and meld the flavors.
3. Balance Acidity: Taste the sauce and adjust seasoning with sugar to balance acidity. This is a crucial step; depending on the tomatoes used, you might need more or less sugar.
Combining Chicken and Sauce
Integrating the Grilled Chicken into the Masala
Once the chicken is perfectly grilled, it’s time to integrate it into your rich masala sauce.
1. Add Chicken to Sauce: Transfer the grilled chicken pieces to the simmering sauce. Stir gently to ensure each piece is well coated.
2. Simmer Together: Allow the chicken to simmer in the sauce for an additional 5-10 minutes. This step infuses the chicken with the masala’s flavors while keeping it moist.
Final Touches
Garnishing your Chicken Tikka Masala is essential for both presentation and flavor.
1. Garnish with Fresh Coriander: Just before serving, sprinkle freshly chopped coriander over the top. This adds a burst of freshness that complements the spices beautifully.
2. Consider Serving Accompaniments: Chicken Tikka Masala is best enjoyed with fluffy basmati rice or warm naan to soak up the rich sauce.
Serving Suggestions and Pairings
Ideal Accompaniments for Chicken Tikka Masala
When serving your Chicken Tikka Masala, traditional accompaniments can elevate the dining experience:
– Basmati Rice: The light and fragrant nature of basmati rice complements the rich, spicy sauce perfectly.
– Naan Bread: Soft, pillowy naan is ideal for scooping up the chicken and sauce. Consider serving garlic or butter naan for added flavor.
– Salad: A simple cucumber and tomato salad with a light vinaigrette can provide a refreshing contrast.
Beverage Recommendations
To complement the rich flavors of Chicken Tikka Masala, consider these beverages:
– Mango Lassi: A sweet and creamy yogurt drink that balances the spice.
– Beer: A light lager or pale ale can enhance the flavors without overpowering them.
– White Wine: A chilled Riesling or Sauvignon Blanc can provide a delightful contrast to the dish’s spiciness.
Presentation Tips
To make your Chicken Tikka Masala visually appealing:
– Use a Deep Bowl: Serve the dish in a deep bowl to showcase the sauce and chicken.
– Garnish Generously: Use fresh coriander and a sprinkle of chili powder for added color.
– Accompany with Sides: Arrange rice or naan artfully around the chicken for an inviting display.
Conclusion
Spicy Chicken Tikka Masala is more than just a meal; it’s a culinary experience that brings together the warmth of spices and the comfort of creamy sauces. By following this detailed recipe and understanding the significance of each ingredient and technique, you can create a dish that is not only delicious but also a celebration of culture and tradition. Whether for a special occasion or a weeknight dinner, this recipe promises to impress and satisfy everyone at the table. Enjoy your cooking journey and the delightful flavors of this classic dish!