Introduction
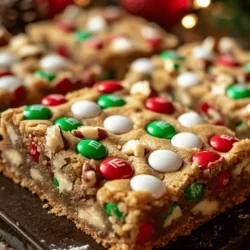
As the holiday season approaches, the air fills with a sense of warmth and joy, inviting us to gather with family and friends. One of the most cherished traditions during this time is baking, which not only fills our homes with delightful aromas but also brings us together to create something magical. Among the myriad of festive treats, gooey Christmas cookie bars stand out as a true symbol of indulgence. These bars combine rich flavors, vibrant festive colors, and a delightful chewy texture that makes them perfect for any holiday occasion.
Gooey Christmas cookie bars are not just a treat; they embody the spirit of the season. Whether you’re hosting a holiday gathering, looking for the ideal gift to share with loved ones, or simply wanting to enjoy a sweet bite at home, these cookie bars are a versatile option that cater to bakers of all skill levels. Easy to prepare and even easier to share, they are a sweet reminder of the joy that comes with the holiday spirit.
The Magic of Christmas Cookie Bars
The tradition of baking during the holiday season dates back centuries, with various cultures contributing their unique recipes and customs. Cookie bars, in particular, have emerged as a beloved treat that encapsulates the essence of Christmas celebrations. Their origins can be traced to the early 20th century, when busy families sought quick and efficient ways to enjoy desserts without the time-consuming process of cutting out individual cookies.
Cookie bars offer the same delightful flavors and festive spirit as traditional cookies but with the added benefit of simplicity. Instead of rolling and cutting dough, bakers can spread a single batch into a pan, bake, and slice into easy-to-serve bars. This convenience makes them ideal for holiday gatherings, where time is often of the essence.
The gooey texture of these cookie bars, combined with rich chocolate and a hint of peppermint, creates a comforting treat that evokes fond memories of holiday cheer. Each bite is a celebration of flavors that perfectly complement the season, making them a must-have addition to any holiday dessert table. As families come together to share these treats, they create not just a sense of nostalgia but also new memories to cherish for years to come.
Essential Ingredients for Gooey Christmas Cookie Bars
Creating the perfect gooey Christmas cookie bars requires a handful of essential ingredients, each playing a crucial role in achieving that irresistible texture and flavor. Here’s a closer look at what makes these ingredients special:
All-Purpose Flour
All-purpose flour serves as the foundation of our cookie bars, providing the necessary structure and stability. Its balanced protein content allows for a chewy texture without being too dense. When measuring flour, it is essential to spoon it into the measuring cup and level it off to ensure accuracy—this prevents the bars from becoming too dry or crumbly.
Baking Soda & Salt
Baking soda acts as a leavening agent, helping the cookie bars rise slightly and become light and fluffy. Salt, on the other hand, enhances the overall flavor, balancing the sweetness of the sugars and elevating the taste profile. Together, these ingredients contribute to the perfect texture and flavor harmony in every bite.
Unsalted Butter
Using unsalted butter is crucial in baking, as it allows you to control the amount of salt in your recipe. The richness of butter adds depth of flavor and contributes to the gooey texture of the cookie bars. Be sure to use room temperature butter, which creams more easily with sugars, creating a light and airy mixture.
Sugars
The recipe calls for both granulated sugar and brown sugar, each bringing its unique flavor and texture. Granulated sugar contributes sweetness and helps the bars spread, while brown sugar adds moisture and a hint of caramel flavor due to its molasses content. This combination creates a delightful balance that enhances the overall taste and gooeyness.
Eggs
Eggs are vital for binding the ingredients together and adding moisture to the cookie bars. They also contribute to the structure and richness of the final product. For the best results, ensure the eggs are at room temperature before mixing, as this helps them incorporate more easily into the batter.
Vanilla Extract
Vanilla extract is often considered the secret ingredient in many baked goods. Its warm and aromatic flavor enhances the overall taste of the cookie bars, making them even more indulgent. Opt for pure vanilla extract for the best flavor, as artificial vanilla can lack the depth and richness that elevates the bars.
Chocolate Chips
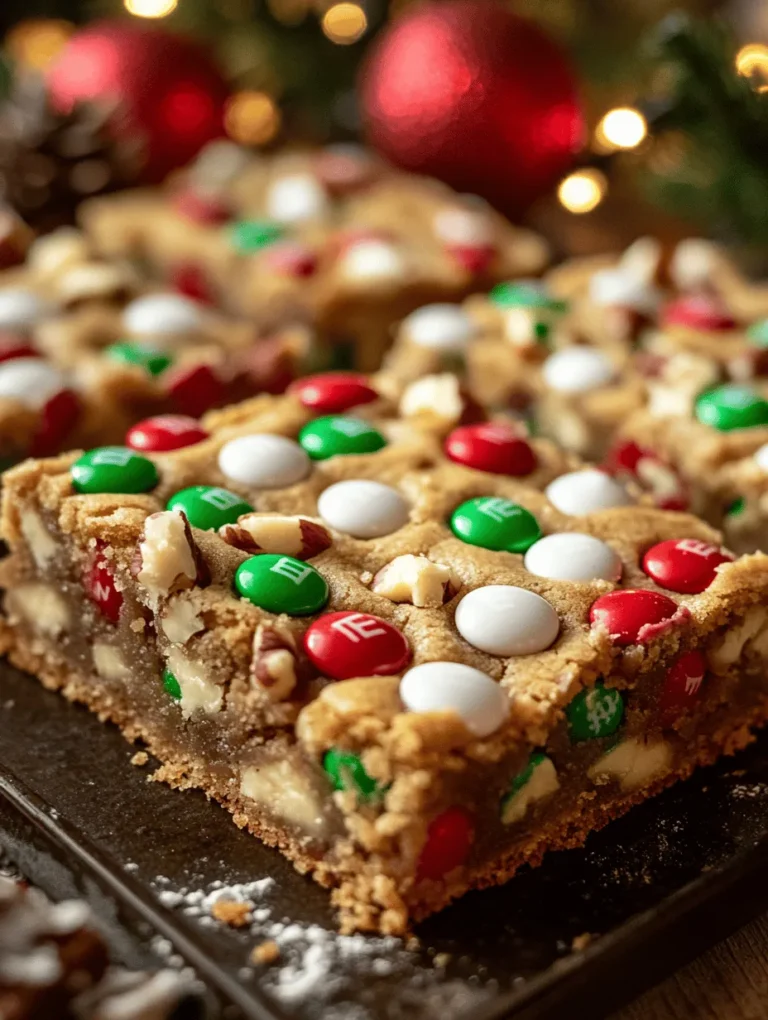
Chocolate chips are the star ingredient in gooey Christmas cookie bars. Semi-sweet chocolate chips provide a rich, balanced sweetness, while white chocolate chips can add a creamy contrast. A combination of both types of chocolate not only adds visual appeal but also creates a delightful flavor explosion in every bite.
Crushed Peppermint Candy Canes
To truly capture the festive spirit, crushed peppermint candy canes are a must. They add a refreshing minty flavor and a delightful crunch that complements the gooey chocolate. Their vibrant red and white colors also add a seasonal touch that makes the cookie bars visually appealing.
Optional Ingredients: Nuts and Cinnamon
For those looking to add extra depth to their cookie bars, consider incorporating nuts like walnuts or pecans for a delightful crunch. Additionally, a sprinkle of cinnamon can enhance the warm flavors and evoke the cozy essence of the holidays. These optional ingredients are perfect for personalizing the recipe to suit your preferences.
Step-by-Step Instructions for Baking
Baking gooey Christmas cookie bars is a straightforward process that ensures even novice bakers can achieve delicious results. Follow these step-by-step instructions to create your festive treat:
Preheat the Oven
Before you begin mixing your ingredients, it’s important to preheat your oven to 350°F (175°C). Proper baking temperature is crucial for achieving the desired texture and consistency. An adequately preheated oven ensures that the cookie bars bake evenly and develop that perfect gooey center. While the oven is heating, you can gather and prepare your ingredients, making the baking process even smoother.
With these key elements outlined, you’re well on your way to creating a festive dessert that will become a staple in your holiday baking repertoire. Keep reading to delve into the next steps, where we’ll guide you through mixing the ingredients and baking your gooey Christmas cookie bars to perfection.
Mixing Dry Ingredients: Tips for Achieving the Right Consistency
The foundation of any great cookie bar lies in the precise mixing of dry ingredients. For our Gooey Christmas Cookie Bars, you’ll start by whisking together the flour, baking soda, and salt in a medium bowl. This step is crucial as it ensures that the leavening agent—baking soda—is evenly distributed throughout the flour, allowing the cookie bars to rise uniformly.
To achieve the right consistency, make sure to measure your flour accurately. The best practice is to spoon the flour into your measuring cup and level it off with a knife, avoiding the temptation to scoop directly from the bag, which can lead to overly dense bars. Additionally, sifting the flour can help incorporate air, creating lighter and fluffier cookie bars. Once mixed, set the dry ingredients aside as you progress to the next step.
Creaming Butter and Sugars: The Importance of Texture
Creaming the butter and sugars together is a pivotal step in creating the perfect texture for your cookie bars. Begin by letting your butter come to room temperature, as softened butter incorporates air more easily, leading to light and tender bars. In a large mixing bowl, combine the softened butter with both granulated and brown sugars.
Using an electric mixer, beat the mixture on medium speed until it becomes light and fluffy—this usually takes about 2-3 minutes. The sugars will dissolve into the butter, creating a creamy paste that is essential for the structure of your cookie bars. The creaming process is important because it incorporates air into the mixture, resulting in a chewy, gooey texture that is signature to these Christmas cookie bars.
Incorporating Eggs and Vanilla: Best Practices for Mixing
Once your butter and sugars are creamed to perfection, it’s time to add the eggs and vanilla extract. Adding eggs one at a time is key—this allows for better emulsification and helps maintain the mixture’s stability. After cracking the first egg into the creamed mixture, beat it until fully incorporated before adding the second. This ensures that the mixture remains smooth and homogenous, ultimately contributing to the overall texture of your cookie bars.
Don’t forget to add the vanilla extract, which not only enhances the flavor but also adds a subtle warmth to the profile of your bars. Mix on low speed until everything is well combined, avoiding overmixing to prevent the cookie bars from becoming tough.
Combining Ingredients: Folding in Chocolate and Peppermint
Now that your wet ingredients are ready, it’s time to bring the dry ingredients into the mix. Begin by gradually adding the dry mixture to the wet ingredients, doing this in two or three increments. Use a spatula or wooden spoon to gently fold the mixture together. This method minimizes the risk of overmixing, which can lead to a denser bar.
Once the dough begins to come together, it’s time to fold in the star ingredients: chocolate chips and crushed peppermint candies. Make sure to use a gentle folding motion, preserving the airiness of the dough. The chocolate chips will melt slightly during baking, contributing to the gooey texture, while the peppermint adds a festive crunch and refreshing flavor that complements the richness of the chocolate.
Spreading in Baking Dish: Techniques for Even Distribution
With your dough fully combined, the next step is to spread it evenly in your prepared baking dish. It’s important to use a spatula to gently push the dough into the corners of the dish, ensuring that it is evenly distributed. For a smooth surface, lightly wet your hands or spatula before pressing down the dough, which helps prevent it from sticking.
Aim for a uniform thickness across the entire baking dish, as this will ensure that the cookie bars bake evenly. If you prefer thicker bars, you can use a smaller baking dish, but be aware that you may need to adjust the baking time accordingly.
Baking: Signs to Look for to Determine Doneness
Baking your cookie bars to perfection requires a watchful eye. Preheat your oven to 350°F (175°C) and place the baking dish in the center of the oven. Bake for approximately 25 to 30 minutes, but keep a close watch towards the end of the baking time. The bars are done when the edges are golden brown, and a toothpick inserted in the center comes out with a few moist crumbs—not completely clean, as you want to maintain that gooey texture.
Another sign of doneness is the slight puffiness of the cookie bars; they will settle as they cool. Avoid opening the oven door too frequently, as this can disrupt the baking process. Once baked, remove the dish from the oven and allow it to cool in the pan for about 10 minutes before moving on to the next step.
Cooling and Cutting: Optimal Ways to Cool for the Best Texture
Allowing your Gooey Christmas Cookie Bars to cool properly is crucial for achieving the ideal texture. After letting them sit in the pan for about 10 minutes, use a sharp knife to carefully cut around the edges. This prevents sticking and helps maintain a clean cut. Then, transfer the bars to a wire rack to cool completely. Cooling on a rack allows air to circulate around the bars, preventing them from becoming soggy.
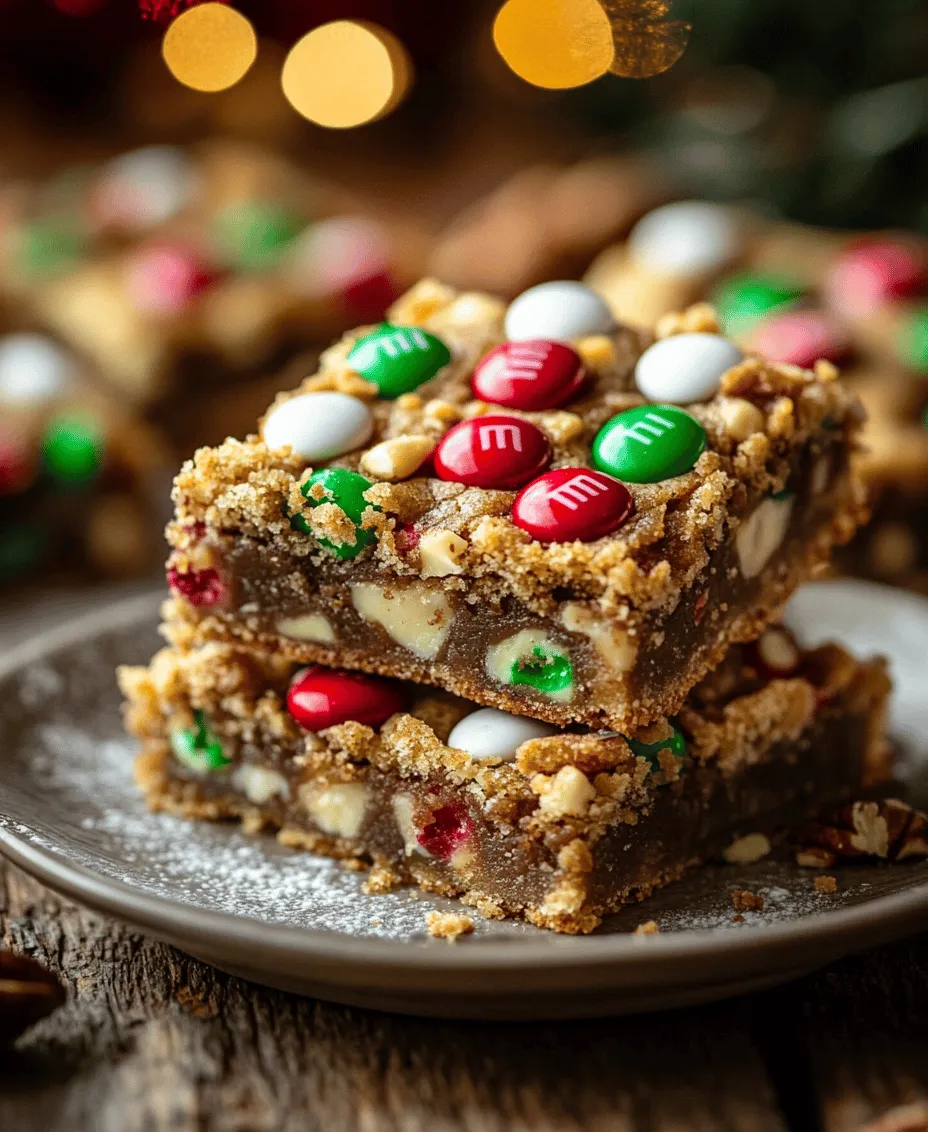
For the best texture, it’s recommended to let the bars cool for at least an hour before cutting them into squares or rectangles. This waiting period allows the chocolate to set slightly, resulting in perfectly gooey, melt-in-your-mouth cookie bars.
The Art of Serving Gooey Christmas Cookie Bars
Once your cookie bars have cooled and are ready to enjoy, it’s time to explore creative ways to serve and present them.
Serving Warm vs. Cool: Differences in Texture and Taste
Gooey Christmas Cookie Bars can be served both warm and cool, each offering a unique experience. When served warm, the chocolate chips will be melty and gooey, creating a delightful contrast with the crunchy peppermint. This is perfect for holiday gatherings where you can serve them fresh from the oven, perhaps with a scoop of vanilla ice cream on top.
On the other hand, cooling them allows the flavors to meld and the texture to become slightly firmer, making them easier to handle and eat. Experiment with both serving styles to see which you prefer, or even offer both options at your holiday party!
Presentation Ideas: Using Decorative Plates or Festive Serving Trays
Presentation can elevate your cookie bars from simple treats to festive delights. Consider using decorative plates or holiday-themed serving trays to showcase your bars. Dust them with powdered sugar for a snowy effect or drizzle them with melted chocolate for an extra touch of indulgence. You can even garnish with additional crushed peppermint or festive sprinkles for a pop of color and added flavor.
For a more rustic presentation, arrange the bars on a wooden cutting board and serve them with a festive cloth napkin. Adding a few holiday-themed decorations, like cinnamon sticks or sprigs of holly, can enhance the festive atmosphere.
Pairing Suggestions: Beverages and Other Holiday Treats
To complement your Gooey Christmas Cookie Bars, consider serving them with beverages such as hot cocoa, peppermint tea, or a rich cup of coffee. The warmth and flavors of these drinks harmonize beautifully with the sweet, chocolatey bars.
You can also pair your cookie bars with other holiday treats like gingerbread cookies or peppermint bark for a delightful dessert platter. This variety not only enhances the flavor experience but also creates a visually stunning spread for your holiday table.
Storage and Shelf Life
To ensure your Gooey Christmas Cookie Bars remain fresh and delicious, consider the following storage methods.
Best Storage Practices: Airtight Containers vs. Covered Dishes
For maximum freshness, store your cookie bars in an airtight container. This prevents them from drying out and keeps them chewy. If you don’t have an airtight container on hand, you can cover a dish with plastic wrap. Store them at room temperature for up to 3 days.
Freezing Options: How to Freeze for Later Enjoyment
If you want to save some bars for later, freezing is a great option. To freeze, allow the bars to cool completely, then cut them into squares. Place the individual squares in a single layer on a baking sheet and freeze for about an hour. Once frozen, transfer them to a resealable freezer bag or airtight container, separating layers with parchment paper to prevent sticking. These bars can be stored in the freezer for up to 3 months.
When you’re ready to enjoy them, simply thaw at room temperature or pop them in the microwave for a few seconds to warm them up.
Shelf Life: How Long They Last on the Counter Versus in the Fridge
Gooey Christmas Cookie Bars will last about 3 days on the counter when stored properly. If kept in the refrigerator, they can last up to a week, although they may become slightly firmer. The refrigerator can be a good option if you prefer your bars a bit denser, but for that classic gooey texture, room temperature storage is best.
Conclusion
Baking Gooey Christmas Cookie Bars is more than just a delightful culinary activity; it’s an opportunity to create lasting memories during the holiday season. The gooey richness of chocolate combined with the refreshing crunch of peppermint creates a treat that is beloved by all.
As you gather with family and friends, sharing these cookie bars can spark joy and connection, reinforcing the spirit of togetherness that the holidays embody. Embrace the joy of baking, explore the creative serving ideas and storage tips, and most importantly, enjoy every bite of these delicious treats. Whether warm from the oven or perfectly cooled, these cookie bars are sure to become a cherished part of your holiday traditions. Share them with loved ones, and let the magic of the season unfold with each gooey, chocolatey bite.